If you are testing your campaigns based on email open rates, you’ll want to test different versions of subject lines and/or preheader text to see which version performs better.
Make sure you have selected to A/B Test based on ‘Email Opens’ when creating a new campaign.
Edit your default email
- Scroll down to the ‘Email’ section in the campaign builder
- Click ‘Open Editor’ under ‘Subject Test A (Default)’
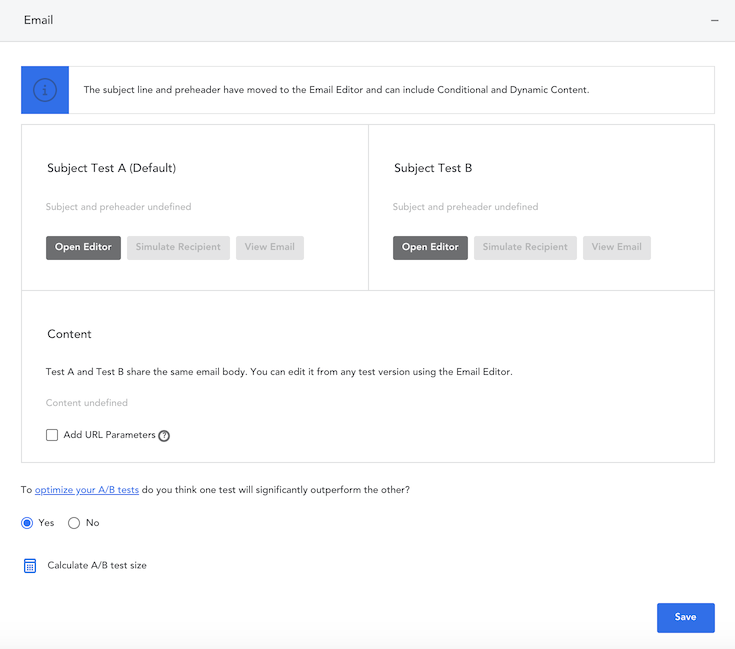
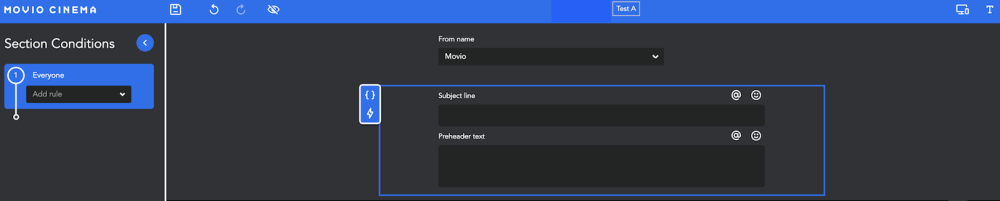
- Select your ‘From Name’ – you can choose to use different sender names using Conditional Content
- Enter your subject line and preheader text for Email A. This should be the one you’d normally use for your campaigns. For example, in this one you may include the recipient’s first name
- Create or edit your email body content. You can learn more about how to use our campaign editor in the email editor section
- Once you finished all edits, click ‘Save’
Set up Test B
- Repeat step c) to f) for Test B. Note, Test A and Test B share the same email body. You can edit it from any test version using the Email Editor
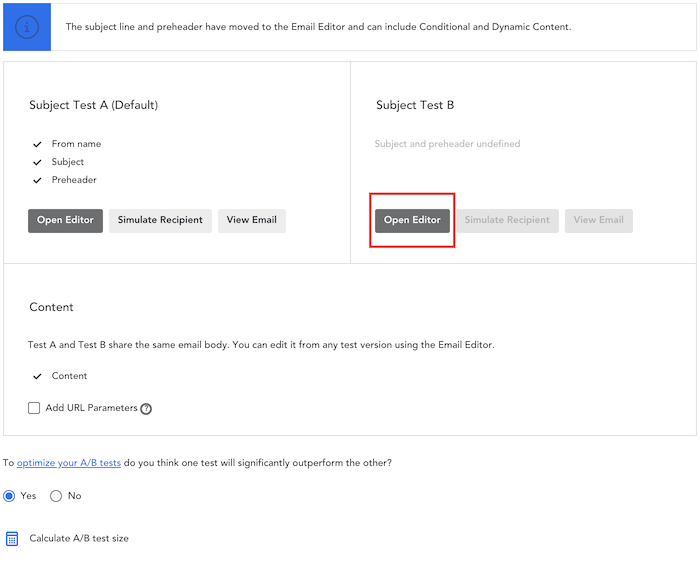
- Click on ‘Add URL Parameters’ to add custom parameters to each URL within your campaign This is useful to track link clicks and can be used for external analytics such as Google Analytics.
- Select if you think one test will significantly* outperform the other?
- If you select Yes, the tests will be sent to a smaller number of recipients in order to maximize the number of members who receive the campaign
- If you select No, the tests will be sent to a larger number of recipients in order to more accurately identify the winning test
NOTE: Movio Cinema would consider one test significantly outperforming the other if there were more than a two percentage points difference. For example, if you think Test A will have a 25% open rate, and Test B will have a 20% open rate, this is a 5 percentage points difference.
- If you would like to know how many contacts are in each A/B Test, click on the calculator icon to ‘Calculate A/B test size’
- Once you have completed this section, click ‘Save’.
Delivery
- Select when you would like your ‘winning’ campaign to be sent by clicking on the calendar icon
- Select when you’d like your tests to be sent:
- You can choose to execute the tests immediately (minimum 3 hours)
- Alternatively, you can ‘Select a time’ and use the sliding bar to determine the length of your tests (maximum 7 days)
- Click Save’
Please note, we highly recommend that you test your campaigns for as long as you can. Ideally, please allow for two or more days.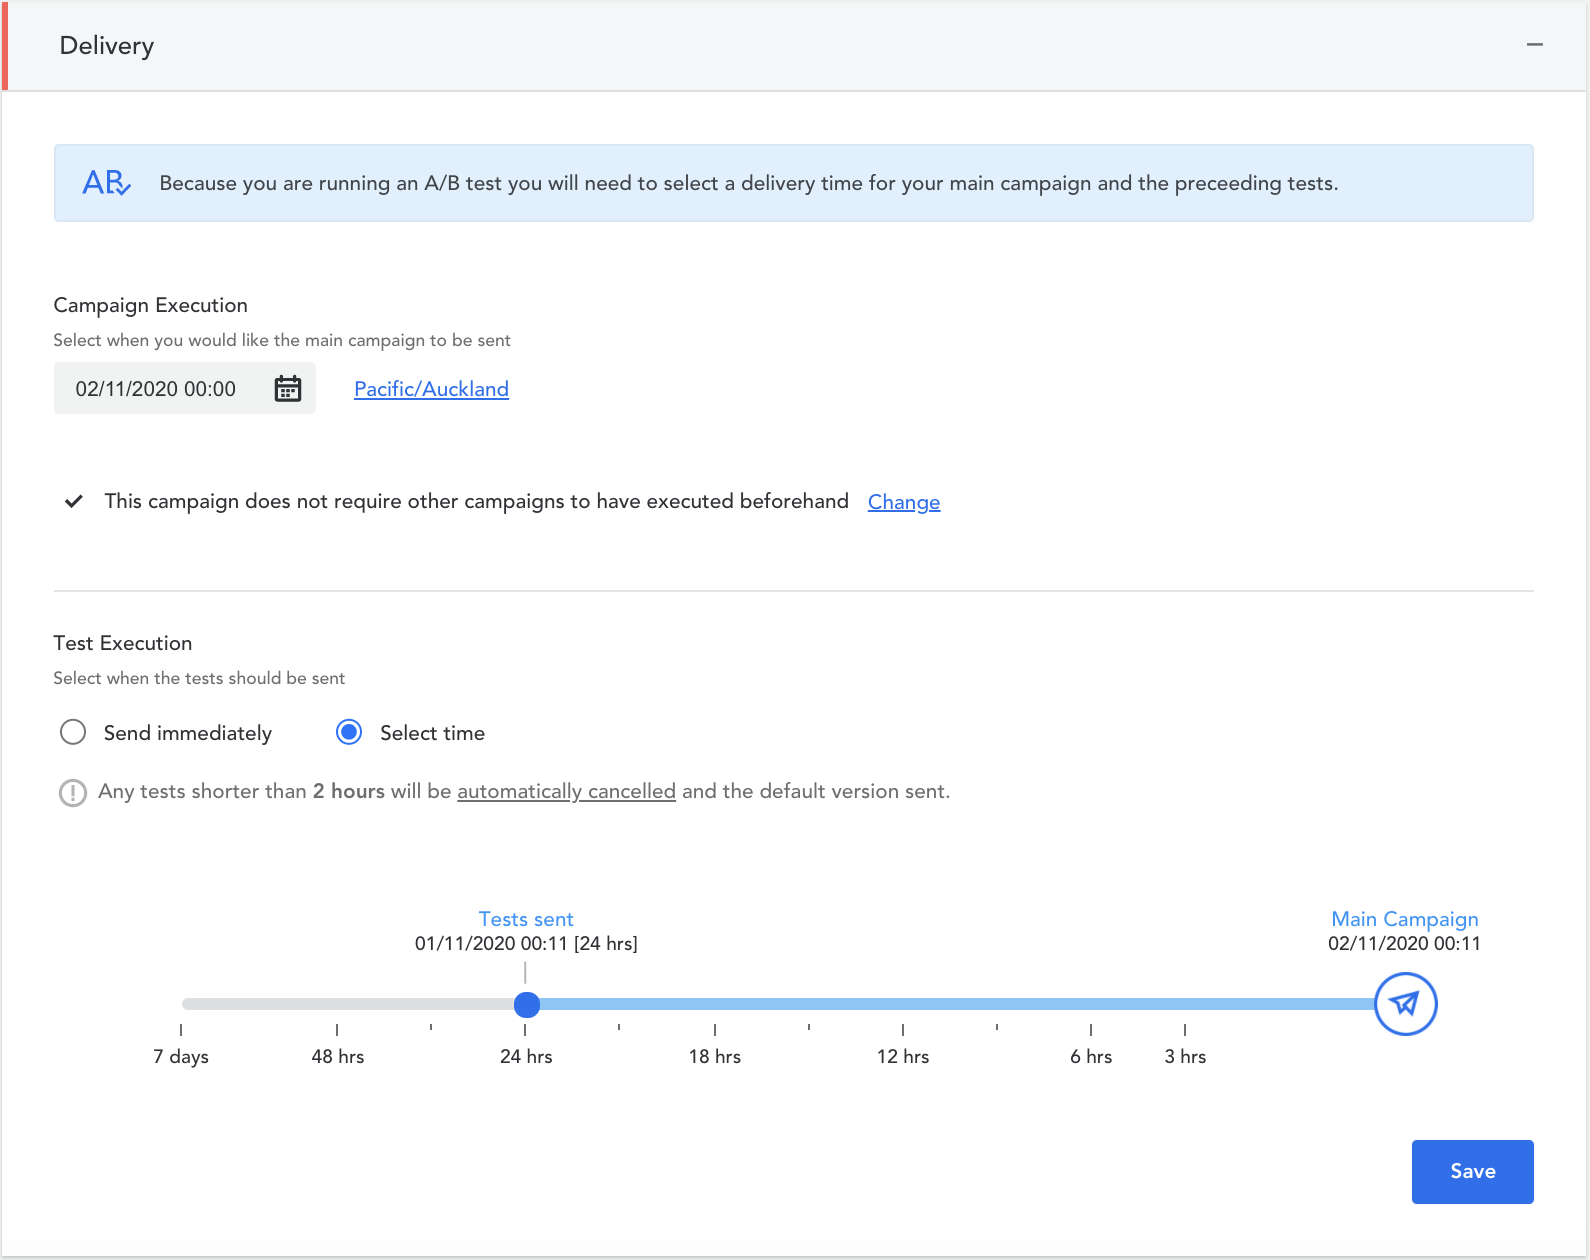
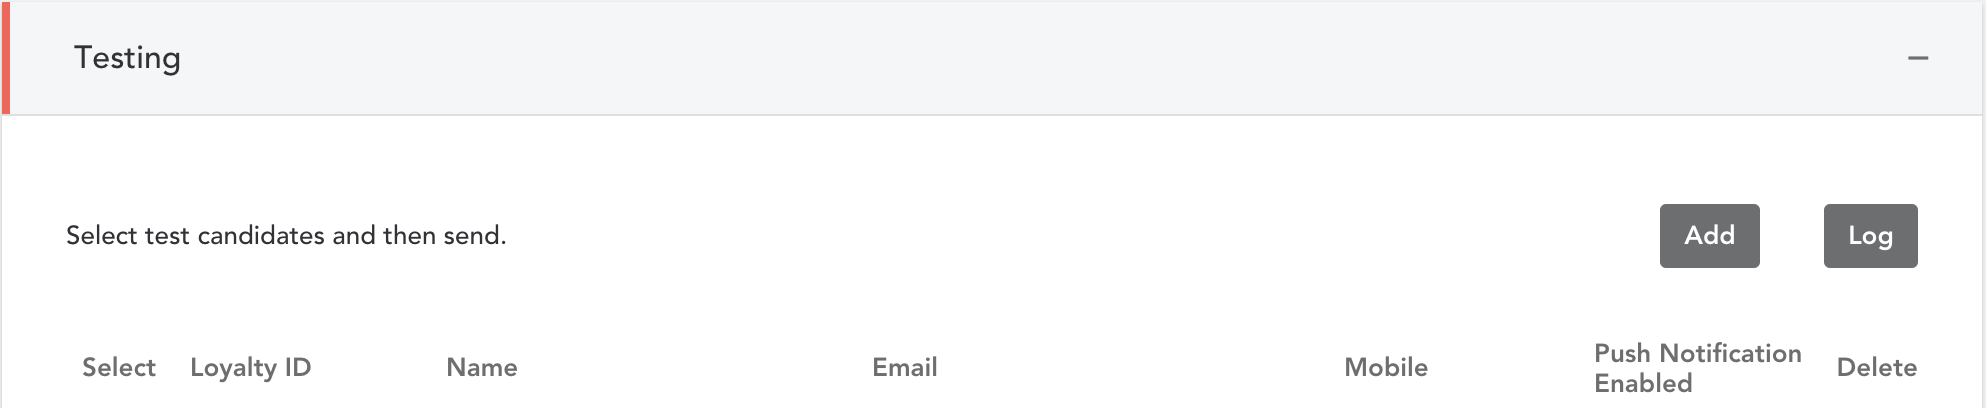
Testing
Prior to sending your tests and winning campaign to your recipient list, you must send an internal test email. This will allow you to test the email campaigns before sending the final campaigns to your members. This is where you can build your sign-off workflow.
- Hand select one or more individuals who should receive the test campaigns
- Additional recipients can be added to the list by selecting the ‘Add’ button and filling in the appropriate information
- Select which tests you’d like to send. You can either send Both, Test A, or Test B
- Click on ‘Send Tests’ to send a test campaign to your test recipients

Execute Campaign
After all the required settings are configured, the ‘Execute’ campaign button will be enabled.
- Click on ‘Execute’
- After reviewing the settings, enter your password in the editable field
- Click ‘Execute’ at the bottom of the window
Comments
0 comments
Article is closed for comments.